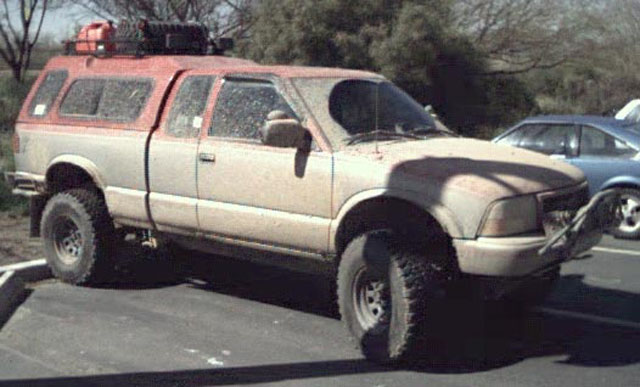
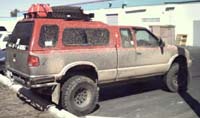
Mods to THE BEAST: My 1998 GMC Sonoma Highrider
Surco roof rack
Added 15 October 2000
This page is mainly designed for folks on the ZR2 discussion list, to show what mods I have made to my truck. You can join the discussion list by sending the word "Subscribe" (without the quotes) to mailto:zr2@zr2hr.org.
After exploring many options for carrying my two spare tires, I was at wits end. 32" tires aren't really all that big, but it sure is difficult to store them on a small truck. They won't fit underneath, and even if I could fit one underneath, it would eat up my hard fought for departure angle increases. My first thought was a roof rack, but I decided against it due to the cost. I tried a Draw-Tite receiver hitch mounted spare tire carrier. It is a well made, inexpensive piece of hardware that I liked the look of on my truck, but I didn't like it much because it yielded very poor visibility, and had to be removed if I needed into the back of my truck. This left me carrying one (or both) spares in the back of my truck. Even one tire doesn't leave much usable room for anything else. So, I returned to square one: a roof rack.
Next task . . . which one? I loved the Wilderness Rack, and Con-Ferr's Porthole rack, but they were pretty expensive for not including mounting hardware, floor kits, or anything else. I found some Surco racks that were pretty cheap, but was unsure about the ability of an aluminum rack to stand up to the weight of a heavy spare tire. Then, someone let me know about a guy who makes and sells racks on Ebay. And he was as close as Flagstaff! The racks weren't exactly cheap ($240), but appeared well made, and I could have it made any size I wanted. I was just about to place my order when I heard through the Z-grapevine (thanks Tbear!) that a Z owner in Phoenix was selling his Surco roof rack. Well, I heard some positive testimonials about the strength of the Surco rack, so dropped the guy a line. I ended up with the 40X48" rack plus a pair of KC Daylighters for $150. Not a bad deal at all in my book!
Anyway, I decided to forego any crossbars, mounting brackets, etc, and just bolt that sucker right to the roof of my Vista fiberglass shell. (Part of the reason for this decision was overhead clearance, and part of the reason was to try to keep my center of gravity as low as possible.) Another factor in my choice of mounting it is that I don't care all that much about my paint job. With that in mind, I'll tell you that I mounted the rack directly to the roof.
Anyway, I decided to forego any crossbars, mounting brackets, etc, and just bolt that sucker right to the roof of my Vista fiberglass shell. (Part of the reason for this decision was overhead clearance, and part of the reason was to try to keep my center of gravity as low as possible.) Another factor in my choice of mounting it is that I don't care all that much about my paint job.
|
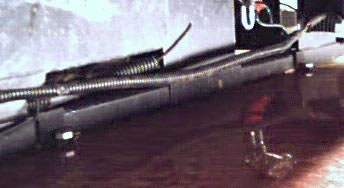
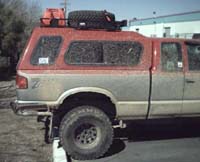
I've got that sucker absolutely plastered to the shell (not literally of course). I didn't use the crossbars at all. The rack came with four little square brackets that secure the rack to the crossbars. I tossed the short screws away that were used for this and got some long bolts. Because my shell is slightly domed from side-to-side, I couldn't mount the rack on the sides without warping the rack around the shell, so I mounted the rack front and back with two brackets front and two brackets back, as far outboard as I could get without severely tweaking the rack.
|
|
|
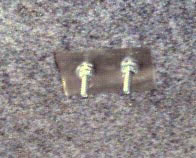
I also added some self adhesive foam under the rack where it contacted the shell (a slight paint protective measure, but also to counteract two screws that stick out a tiny bit under each floor rail. Then it was just a matter of lining the rack up, drilling the holes, and bolting it down, using silicone (Marine Goop) to seal the holes from the rain.
|
|
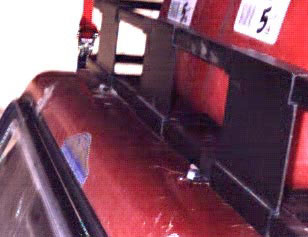
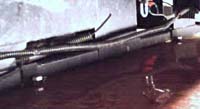
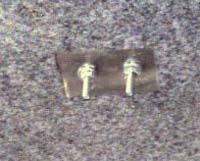
For the under side of the shell, I wanted to increase my contact point for the pressure of the bolts, so I chopped up a piece of moderate gage sheet metal and used that as a large "washer" that encompased both bracket bolts plus an inch or two beyond the bolts. I also added washers to the nut side to keep them from pulling through the sheet metal.
|
|
I also added some self adhesive foam under the rack where it contacted the shell (a slight paint protective measure, but also to counteract two screws that stick out a tiny bit under each floor rail. Then it was just a matter of lining the rack up, drilling the holes, and bolting it down, using silicone (Marine Goop) to seal the holes from the rain. For the under side of the shell, I wanted to increase my contact point for the pressure of the bolts, so I chopped up a piece of moderate gage sheet metal and used that as a large "washer" that encompased both bracket bolts plus an inch or two beyond the bolts. I also added washers to the nut side to keep them from pulling through the sheet metal.
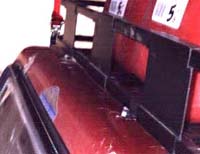
With this set up, the flooring sat about 1/4" off the top of the shell, and would sag and rub the shell with any weight on them, so I also bolted the flooring down in three places with rubber strips under each one (again, a paint protective measure) so that they didn't move around and scratch the hell out of the shell. Makes for a good solid surface that keeps large items from direct contact with the shell. But things like my gas cans . . . they actually rest in part on the surface of my shell (probably not good for the paint, but oh well. If you didn't want anything to touch the top of the shell, it would be REALLY easy to bolt a sheet of aluminum or steel to the top of the flooring. You can get that stuff at ACE, Home Depot, or most any hardware store.
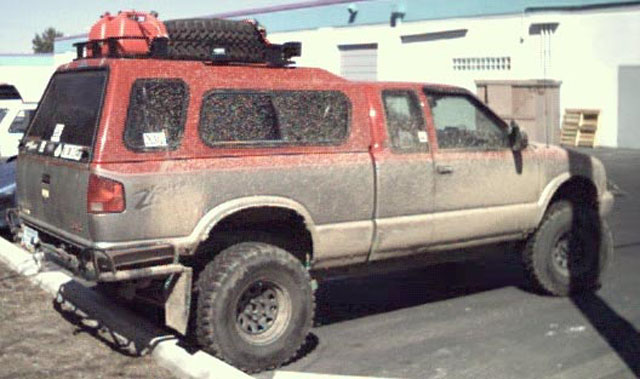
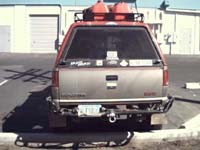
And here are some pictures of the roof rack mounted to my shell:
|
|
|
|
|
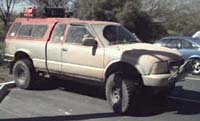
I ran my first tank of gas through with the rack on, and my fuel economy got sucked down to 16mpg. Because of that, and the fact that I'm pushing it for fitting under my; carport with the rack on, my truck is going to have a new look most of the time. I am going to keep the shell/rack off most of the time, and give my truck the pre-runner look. I bought a tailgate net to further enhance the pre-runner look.
So now my truck will have two distinct looks. The off-road race pre-runner truck, and the racked up trail ready truck. Looks good either way!
If you're in the Tucson area, drop me a line and we can go wheelin' sometime.

Speaking of which, if you own a Highrider/ZR2/BlaZeR2, or want to find out more about the best little 4X4's around, check out these great sites:
http://www.zr2.com and http://www.zr2hr.org
There is also a ZR2 discussion group, which is very fun for talking about our special trucks and in getting ideas, help, and useful information. I have learned a great deal from the list. You can join by sending an e-mail to mailto:zr2@zr2hr.org with the word "SUBSCRIBE" (without the quotes) in the subject line.
ENJOY!

ZR2 - Site Number 4
[ Next Site | Previous Site | List Sites ]
This ZR2 & HighRider Webring site owned by WolfSoul .
[
Previous 5 Sites
|
Previous
|
Next
|
Next 5 Sites
|
Random Site
|
List Sites
]